C Purlin vs Z Purlin: Sizes, Spacing, Load & Price 2026
Compare C purlin vs Z purlin: sizes, spacing rules by cladding, load capacity, lapping and coating. Factory-direct cold-formed purlin specs from a CE and ISO 9001 plant.
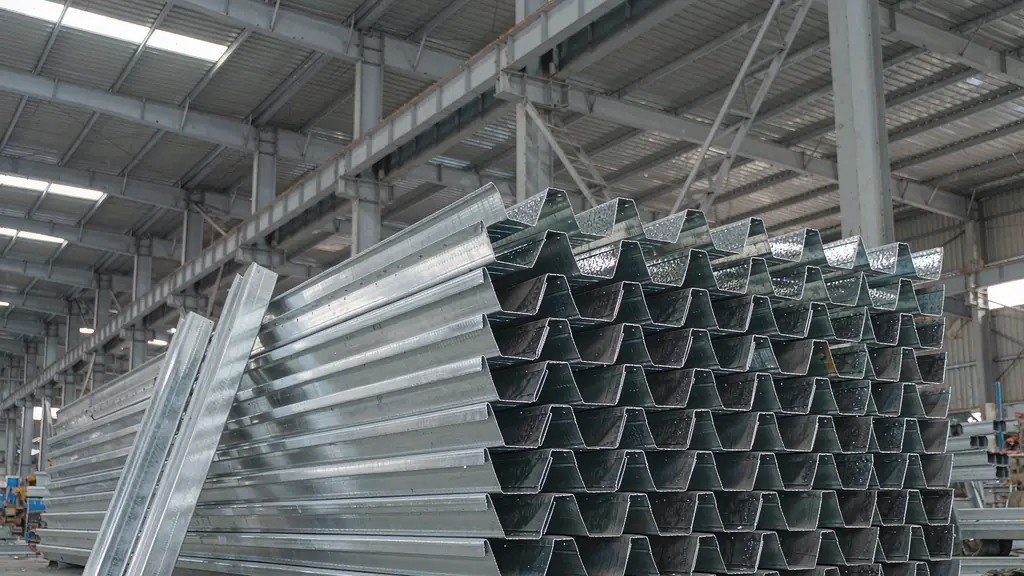
Purlins are the least discussed members in a steel building and the ones most likely to generate a callback. They carry the roof sheet, pass wind uplift into the primary frame, and brace the rafter's compression flange against buckling. When a warehouse roof drips at the end laps or the cladding drums in a storm, the cause is usually a purlin sized by habit rather than by the sheet span and wind zone.
This guide is for buyers, estimators and project engineers who specify cold-formed purlins for export projects. It covers the real difference between the C and Z profiles, the sizes a roll forming line actually produces, how spacing is set by the cladding rather than the frame, and what purlin tonnage costs ex-works. The specifications reflect what we run on the cold-formed lines at our CE and ISO 9001 certified plant in Shangqiu, China, which supplies galvanised C and Z purlin to projects in more than 40 countries.
> Key Takeaways > - Z purlins win on multi-span roofs. The asymmetric section laps over supports, creating continuity that cuts the design moment and allows a lighter section or wider spacing. C purlins suit single-span roofs, wall girts and small canopies. > - Spacing is set by the cladding, not by the frame. A 0.35 mm sheet needs purlins at roughly 1.2 m; a 0.60 mm sheet can run to about 2.0 m. Industrial practice sits in the 1.2 m to 1.8 m band for roofs and 1.2 m to 2.4 m for wall girts. > - Deflection governs more often than strength. Long, light cold-formed sections are usually controlled by the serviceability limit (commonly span/150 to span/240) before bending or shear becomes critical. > - Bridging is not optional. One row at mid-span can raise a laterally unbraced purlin's moment capacity by roughly four times; two rows at third points, about nine. > - Coating choice outlives the section choice. Z275 hot-dip galvanising is the industrial baseline; AZ150 aluminium-zinc is the upgrade for coastal and chemically aggressive sites.
What Purlins and Girts Actually Do
A purlin is a horizontal secondary member spanning between rafters or trusses, carrying roof cladding. A girt is the same idea on the wall, spanning between columns. Both are cold-formed from galvanised or aluminium-zinc coated coil, typically 1.5 mm to 3.5 mm thick, with yields from 235 to 550 MPa.
They do three jobs at once:
- Load transfer. Dead load from sheet and insulation, live load, wind pressure and suction, and maintenance traffic all reach the primary frame through the purlin.
- Cladding support. Purlin centres define the sheet's spanning capacity. Space them too far apart and the sheet deflects under foot traffic, the laps open and the roof leaks long before anything fails structurally.
- Frame bracing. Restrained properly, purlins brace the rafter's compression flange and let the engineer specify a lighter rafter.
C Purlin vs Z Purlin: The Structural Difference
The two profiles look similar on a drawing and behave very differently on a roof.
| Factor | C purlin | Z purlin |
|---|---|---|
| Section shape | Symmetrical lipped channel | Point-symmetric zed with unequal flanges |
| Typical use | Single-span roofs, wall girts, canopies, small sheds | Multi-span industrial roofs, wide bay spacing |
| Continuity | Butted or sleeved at supports | Lapped and nested over supports, giving a continuous beam |
| Material efficiency | Higher steel weight for the same span | Roughly 15% to 20% lighter for the same span when lapped |
| Cladding fixing | Flanges on the same side, easier for sheets | Needs the lap detail to be detailed correctly |
| Installation | Simpler, more forgiving on site | Requires accurate lap alignment and fastening |
| Best for | Spans up to about 6 m single span | Spans up to about 10 m continuous |
Wind uplift reverses the loading: the bottom flange goes into compression and wants to buckle sideways. That is the check that catches undersized purlins in cyclonic and typhoon regions, which is why uplift deserves its own look at the steel structure wind load calculation guide.
Standard C and Z Purlin Sizes
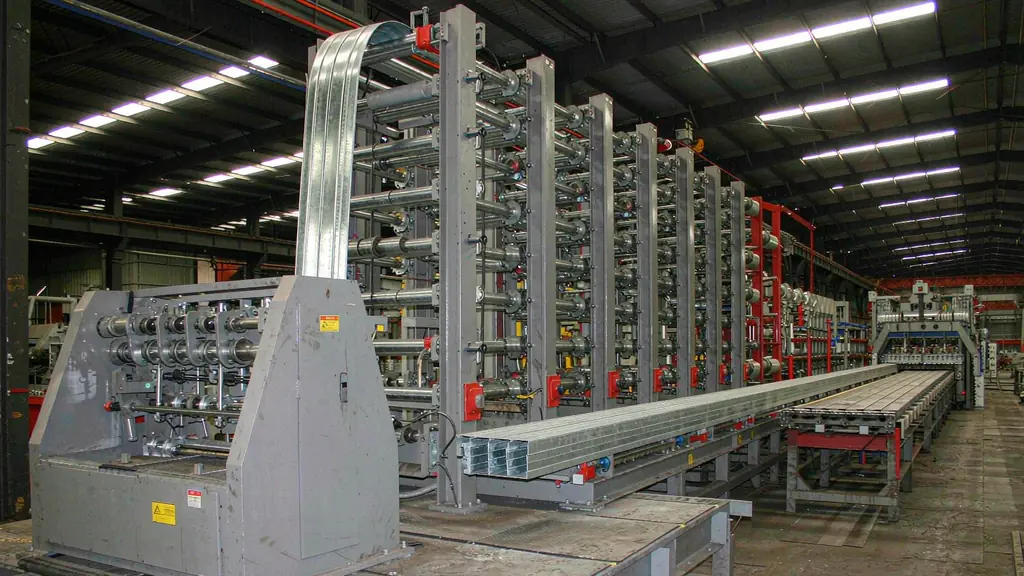
Cold-formed lines work within a fixed envelope. Asking for a section outside it usually means a tooling change and a longer lead time, so it pays to specify within the standard range.
| Parameter | Typical range | Notes |
|---|---|---|
| Web depth | 80 mm to 300 mm | C80 to C300, Z80 to Z300. 150 mm to 250 mm covers most industrial roofs |
| Flange width | 50 mm to 80 mm | Wider flanges improve cladding bearing but increase distortional buckling risk |
| Lip (stiffener) | 20 mm to 30 mm | The lip is what makes the section work; do not trim it |
| Thickness | 1.5 mm to 3.5 mm | 2.0 mm and 2.5 mm are the volume gauges |
| Length | 6 m to 12 m cut to length | Nesting Z sections saves container space |
| Yield grade | Q235 / S280GD, Q355 / S350GD, S550GD / G550 | Higher grades allow thinner material on long spans |
One practical trap: some markets write the same section as "Z20015", meaning 200 mm deep in 1.5 mm material. Confirm the notation before comparing quotations, because 2.0 mm and 1.5 mm sections look identical in a spreadsheet and differ by 25% in weight.
How to Set Purlin Spacing
Spacing is an economic balance between the sheet and the steel. Tighter spacing lets you use a cheaper, thinner sheet but adds purlin lineal metres; wider spacing does the reverse.
| Roof sheet thickness | Typical maximum purlin spacing |
|---|---|
| 0.35 mm | 1.2 m |
| 0.42 mm to 0.47 mm | 1.5 m |
| 0.55 mm | 1.8 m |
| 0.60 mm and above | 2.0 m |
Sandwich panel roofs change the calculation. A 50 mm or 75 mm insulated sandwich panel is far stiffer in bending than a single skin sheet, so purlin centres can often open up, but the panel manufacturer's span table and fastener pattern govern.
Two rules survive every project: let the cladding set the spacing first, then let the engineer's span table confirm the section. If the two disagree, the cladding wins, because a sheet that deflects will leak regardless of what the purlin can carry.
Thickness, Grade and Coating: What to Specify
Base steel. Q235B is the general purpose grade, matching S235JR for most purposes; Q355B is the step up for long spans and heavy loads; S550GD or G550 is the high-tensile option where the design is pushing for minimum weight. To reconcile a Chinese grade against an EN, ASTM or JIS callout, the steel grade equivalent chart maps them side by side.
Coating. Z275 hot-dip galvanising (275 g/m² both sides) is the industrial default. AZ150 (150 g/m² of 55% aluminium-zinc) costs more and lasts considerably longer in coastal and agricultural atmospheres. Pre-painted PPGI colour coated coil suits exposed eaves and canopies where the purlin is visible. Match the coating to the site corrosivity category rather than the purchase price; the C1 to C5 corrosion protection guide sets out which environment class calls for which system.
The Design Checks That Actually Govern Purlin Size
Cold-formed purlins are checked under a dedicated code family: EN 1993-1-3 in Europe, AISI S100 in North America, AS/NZS 4600 in Australia and New Zealand, and GB/T 50018 in China. In North America the Metal Building Manufacturers Association also publishes purlin and girt design tables that many suppliers work from. The methods differ in detail but share the same effective width philosophy.
The checks that decide a purlin size, in the order they usually bite:
- Bending about the major axis, using the effective section modulus rather than the gross one, because thin plates buckle locally before they yield.
- Deflection under service load, commonly span/150 to span/240 for roofs and span/100 to span/180 for walls depending on the governing code and project spec.
- Wind uplift reversal, where the unrestrained bottom flange goes into compression.
- Distortional buckling of the lip and flange, which is what limits how wide you can make the flange relative to its thickness.
- Web crippling at the support, under the concentrated reaction from the cleat.
- Shear, which rarely governs on a purlin of normal proportions.
Bridging, Lapping and Connection Details
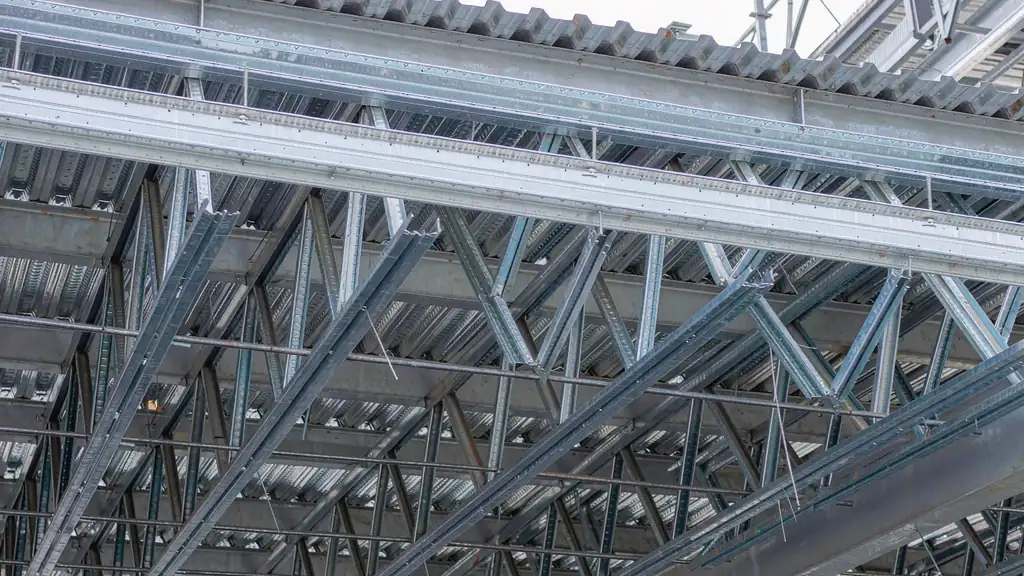
Bridging (also called fly bracing or sag rods) ties adjacent purlins together along the building length so they cannot roll or buckle sideways. AISI S100 requires the bridging system to resist about 2% of the compression flange force as a lateral restraint force. Typical spacing is one row at mid-span, or two rows at the third points on longer spans. The effect is large: one row at mid-span roughly quadruples the moment capacity of an otherwise unbraced member, and two rows at third points can take it to roughly nine times.
Lapping is what makes the Z section pay off. Overlapping the ends over a support and fastening through both webs produces a continuous member, so the support moment is shared rather than carried by a single section. Typical lap length runs 150 mm to 250 mm depending on reaction and fastener layout. A lap that is too short, or fastened through only one flange, delivers a simple span at continuous-span prices.
Cleats and fasteners connect purlins to the rafter flange and girts to the column flange. In material under 3 mm, connections fail by bearing and tilting rather than bolt shear, so fastener gauge and edge distance matter more than bolt grade. For the primary frame decision between site bolting and shop welding, see the bolted vs welded connection guide.
Estimating Purlin Weight and Cost
Weight per metre follows a simple formula: cross-sectional area in mm² multiplied by 0.00785. For a C200×70×20×2.0, the flat developed width is about 380 mm, the area about 760 mm², and the weight about 6.0 kg/m. The same section in 2.5 mm is about 7.5 kg/m.
To convert to order quantities, count the purlin lines, multiply by the run length, and add 5% to 8% for laps, cutting waste and site damage. On a typical 1,500 m² warehouse with 1.5 m purlin centres, roof and wall secondary steel usually lands between 8% and 14% of total frame tonnage, depending on span and wind zone.
On price, use a band rather than a number. Galvanised C and Z purlin typically quotes around USD 850 to 1,350 per tonne ex-works, with AZ150, 550 MPa grade and non-standard depths at the upper end and plain Z275 C sections in volume gauges at the lower end. Coil price is the biggest driver, so a quotation held open for more than two weeks should be re-checked before you commit. For how per-kilogram rates are built up, see structural steel price per kg in 2026, and run your tonnage through the steel structure cost calculator before enquiring.
Common Specification Mistakes
- Specifying depth only. "C200" without flange, lip and thickness is not a specification. Two suppliers will quote two different sections and the cheaper one will be thinner.
- Ignoring the lip. The lip is the stiffener that makes a thin section work, so sections quoted without a lip dimension are not comparable.
- Setting spacing from the frame grid. Purlin centres follow the sheet, not the column spacing.
- Skipping bridging to save money. Removing bridging forces a much heavier purlin and costs more in steel than the bridging saved.
- Leaving the coating unspecified. "Galvanised" is not a quantity. State Z275 or AZ150.
- Forgetting the wind zone. Uplift governs in cyclone and typhoon regions, and it matters most on large clear-span buildings, which is why purlin specification is tied closely to the warehouse design guide.
Frequently Asked Questions
What is the difference between a C purlin and a Z purlin?
A C purlin is a symmetrical lipped channel used for single spans up to about 6 m, wall girts and small structures. A Z purlin is point-symmetric, laps and nests over supports to form a continuous beam, and is the standard choice for multi-span industrial roofs up to about 10 m. For the same span and load, a lapped Z system typically uses 15% to 20% less steel.
How far apart should purlins be spaced?
Spacing follows the roof sheet's spanning capacity. As a working guide, 0.35 mm sheet needs about 1.2 m centres, 0.47 mm about 1.5 m, 0.55 mm about 1.8 m, and 0.60 mm or thicker about 2.0 m. Wall girts usually run 1.2 m to 2.4 m and align with door and window openings. Always confirm against the cladding manufacturer's span table.
What size purlin do I need for a 6 m bay?
For a 6 m bay at 1.5 m centres with standard 0.47 mm sheeting and moderate wind, a C200×70×20×2.0 or Z200×70×20×2.0 is a common starting point. Higher wind, snow load or a steeper pitch pushes that to 2.5 mm or a deeper section. The deflection limit usually decides it.
Can I use C purlins for wall girts?
Yes. C sections are the conventional choice for girts because the flanges sit on the same side, which makes cladding fixing straightforward and avoids the lap detail a Z section needs. Z girts are used where wall spans are long enough for continuity to pay off.
Should purlins be galvanised or aluminium-zinc coated?
Z275 hot-dip galvanising is the industrial default and adequate for most inland sites. AZ150 aluminium-zinc gives considerably longer service life in coastal, agricultural and industrial atmospheres, and is worth the premium within a few kilometres of the sea or where livestock is housed. Match the coating to the site corrosivity category.
Do purlins need bridging?
Yes, unless the cladding system is proven to provide full lateral restraint. Without bridging the purlin is unrestrained over its full span and lateral-torsional buckling cuts its capacity severely. One row at mid-span typically raises capacity by about four times.
Get Your Purlin Schedule Priced from the Factory
Purlins are where a steel building quietly loses money: a section one gauge too heavy across 40 tonnes of secondary steel, or a spacing set by habit instead of by the sheet. Both are avoidable at the specification stage.
Send us the roof plan, the cladding specification, the design wind speed and the applicable design code, and we will return a purlin schedule with section, gauge, coating, bridging layout and tonnage, priced ex-works or CIF to your port. We run five production lines at 5,000 tonnes per month, hold CE and ISO 9001 certification, and ship complete steel packages to more than 40 countries.
If you are still at budget stage, the steel structure cost per square meter guide gives you the frame-level numbers, and the RFQ process guide explains what to include so the first quotation comes back usable. For erection sequencing, see our step-by-step erection guide.
Ready to price your purlins? WhatsApp +86 16650735555 or email [email protected] with your drawings.
Related Articles
Steel Grade Equivalents: Q235, Q355 vs S355, A36 and SS400
Steel grade equivalent chart for buyers: Q235 vs Q355, S235/S355, ASTM A36 and SS400. Compare yield, impact toughness, welding and CE/EN 1090 fit from a CE/ISO factory.
Steel Structure Engineering: Design to Construction Workflow
Complete guide to steel structure engineering workflow. Learn each phase from design analysis and connection detailing to fabrication, shipping, and on-site
Need a Steel Structure?
Get a free quote from our engineering team. We respond within 2 hours.
Request a QuoteStay Updated
Get steel structure tips, cost guides, and industry insights delivered to your inbox.
No spam. Unsubscribe anytime.